Midjourney is an amazing tool that uses artificial intelligence (AI) to turn text and pictures into really creative results. But do you want to know how to use reference photos in Midjourney to help the AI make art?
In this detailed guide, we’ll explore how to use reference images in Midjourney.
We’ll also give you some tips and tricks to get the best results.
Let’s get started!
Understanding Midjourney: What is Midjourney?
Midjourney is a tool that makes unique art using GANs from your descriptions or pictures. You give a prompt or show an image, and it creates art that reflects your ideas in surprising ways.
You can also use Midjourney with images as your guide. These could be drawings, photos, or other visuals. The AI then makes artwork matching the style, colors, or layout of your image. This feature opens up new creative options!
If you want to try out Midjourney with your own photos and save money, you can use Midjourney for free.
Methods To Use Reference Photos in Midjourney
If you want to create reference photos in midjourney, you must upload your image first.
There are two different methods to upload your image.
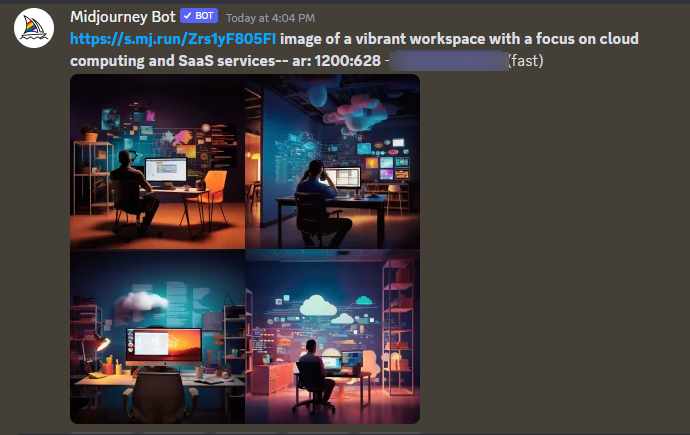
Method 1: Accessing Images Using the Web
Midjourney allows you to use images from the internet easily. You can just put a web link or URL to an image in Midjourney’s text box. But remember, the link and midjourney prompt should end with an image format like .jpg, .png, or .gif.
Method 2: Upload Your Images
If you want to use your own pictures, Midjourney makes it easy. Before you start, it is recommended to start with the Midjourney Bot as it prevents other server users from seeing an image.
Here’s what you need to do:
- Drag the photo file you want to use into any newcomer channel on Midjourney.
- Hit Enter to upload the photo.
- After uploading, click on the photo to make it bigger.
- Right-click on the bigger photo and choose “Copy Link.”
That’s all! You now have a link for your photo which you can use in Midjourney as a prompt. You might also want to learn how Midjourney can write text, adding more creativity to your work.
Step-by-Step Guide to Use Reference Photos in Midjourney
Amazingly, creating reference photos in midjourney is a simple procedure. From image weight to text prompt and aspect ratio, there are a few parameters that require proper consideration.
Let us share how to consider these parameters properly to generate images.
Follow these 5 simplest steps and create your image in a jiffy.
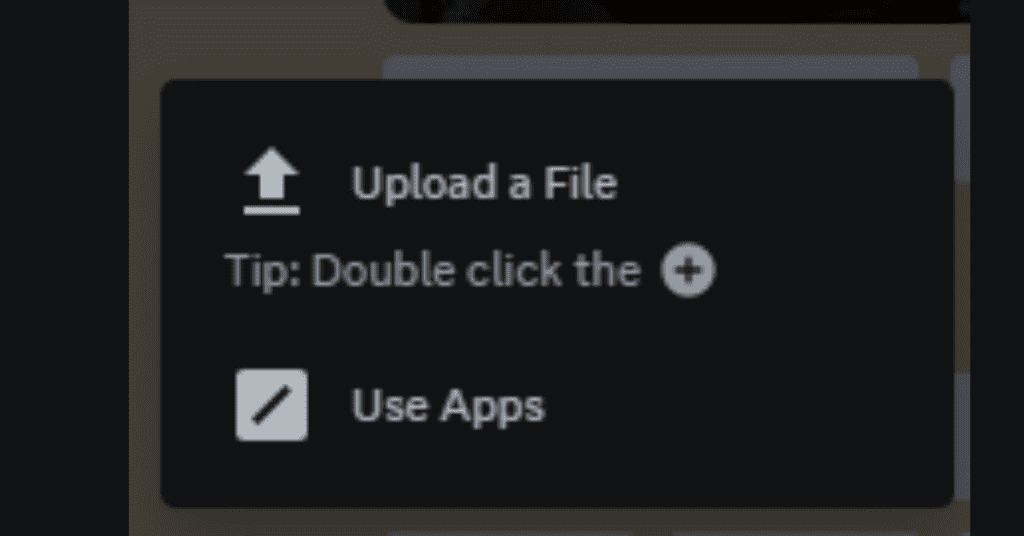
Step 1: To add your picture to Discord, double-click the “+” sign near the text box or pick ‘Upload a File.’ Once you choose your file, press enter to put it up.
Step 2: On your computer, click on the picture and select ‘Open in Browser.’ Then, copy the URL at the top of the page. This address should end with .jpg or .png.
If you’re on the Discord app on your phone, press and hold the picture, then pick ‘Copy Media Link.’
Step 3: Write /imagine in the message box and put in the web address of the picture.
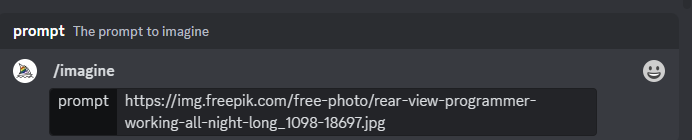
Step 4: Add some extra keywords and your image resolution after the URL.

Step 5: After you prepare your prompt, Midjourney will begin creating images that look like your reference.
How to Apply Image Weight in Midjourney
You can change the final by using an Image Weight (IW) in your prompt. The Image Weight lets you decide how much Midjourney should try to copy your uploaded image.
Here what’s you can write:
- IW 2: closer to the reference image
- IW 1: adds more random objects and people
- IW 0.5: adds even more random objects and people

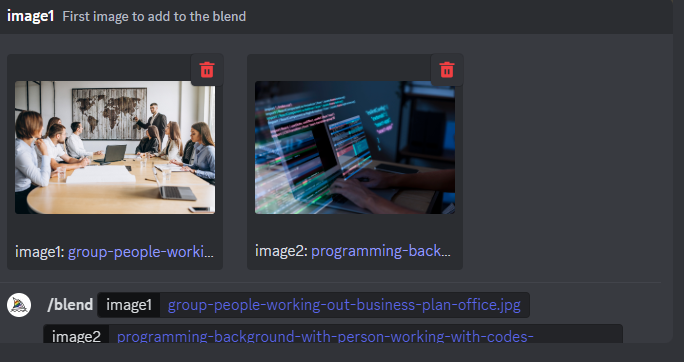
What's the Process for Effectively Combining Two Photos in Midjourney?
If you need to combine two photos, you can use the /blend option. But if you also want to give some specific instructions, simply combining two image links with extra keywords in your prompt is an easier method.
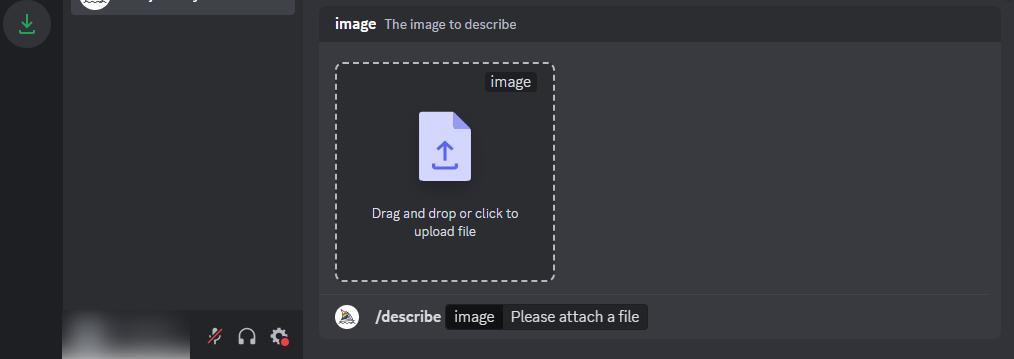
Steps to Use the Describe functionality in Midjourney
To discover the particular style of an image you have, or to gain inspiration for new prompts, you can use the /describe feature in Midjourney and upload your picture.
Step 1: Type /describe in the text field, which will then allow you to upload an image.
Step 2: Upload the chosen image and hit enter.
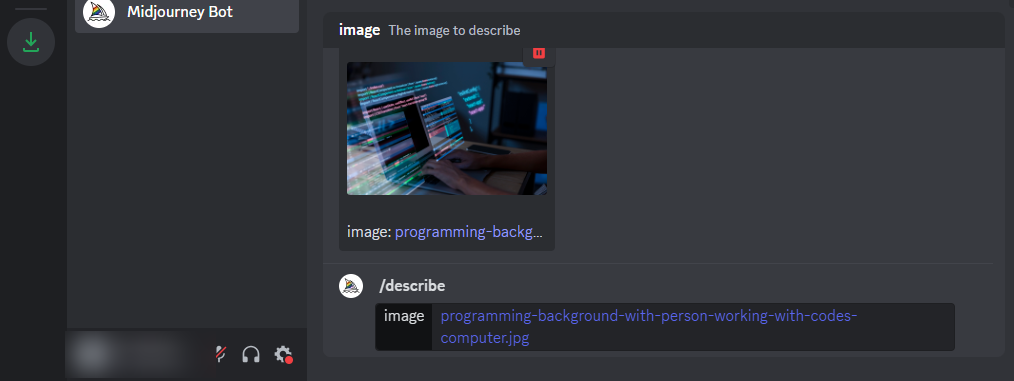
Midjourney will give you four multiple descriptions and you can use any of them as a new prompt.

Advanced Tips for Reference Image Integration
Using reference images in Midjourney projects can significantly enhance the quality and precision of your AI-generated art.
Here’s a comprehensive guide on how to use reference photos in Midjourney, ensuring that the AI image you create aligns closely with your vision.
Direct Message for Custom Requests: If you have a specific idea or concept in mind, consider sending a direct message to the Midjourney bot. This approach allows for more personalized assistance, ensuring that your midjourney image closely matches your expectations.
Preparing Your Reference Image: Before you upload the image, make sure it’s well-prepared. This means selecting an image file that is clear, high-quality, and closely represents the theme or style you’re aiming for in your new image. The better the reference, the more accurate the AI art generation will be.
Uploading the Image: To integrate a reference in Midjourney, you’ll need to upload the image directly to the platform. This can be done by attaching the image file to your message. Ensure that the image is in a compatible format and size for optimal results.
Using Keywords and Commands: When you upload the image, accompany it with specific keywords or commands that describe the kind of image generation you’re aiming for. This helps the AI in Midjourney to better understand the context and style you’re seeking.
Adjusting Parameters: Midjourney offers various parameters that you can tweak to refine the AI image generation process. Experiment with these settings to see how they affect the outcome of your AI art. This might include adjusting color schemes, textures, or overall composition.
Review and Refine: Once you receive the initial AI-generated image, take the time to review it thoroughly. If it doesn’t quite match the image you want, don’t hesitate to make further adjustments or provide additional guidance to the Midjourney bot.
Iterative Process: Remember, creating the perfect AI art using a reference image is often an iterative process. It might take a few tries to get it just right, so be patient and keep experimenting with different images and commands.
By following these advanced tips, you can effectively use reference photos to guide the AI in Midjourney, leading to more precise and satisfying outcomes in your image generation projects.
Bottom Line
In conclusion, utilizing reference photos in Midjourney offers a unique and powerful way to guide the AI in creating art that resonates with your vision. Whether you’re working alone or with text prompts, the process is intuitive and user-friendly.
By simply pasting the link within the prompt box or uploading a jpg directly, you can influence the AI to generate artwork in the specific style of an existing image or theme. The AI tries to mimic your uploaded reference, capturing the essence of your desired output.
However, remember that the final result can vary unless your prompt is clear and the reference image is well-chosen. Midjourney’s flexibility allows you to experiment with different styles and concepts, so feel free to use the prompt box to add your creative touch.
Whether you’re a seasoned artist or a beginner, this tool opens up a world of artistic possibilities, making the creation of AI art accessible and enjoyable for everyone.