Creating a blog post outline can often feel like a daunting task, especially when you’re staring at a blank screen. But what if I told you could draft a solid outline in 8 minutes? Yes, you read that right! If you’ve ever thought, “I want to write my blog post but don’t know where to start,” you’re in the right place.
This guide will walk you through an 8-step solution to create a blog post outline quickly and efficiently. By following these simple steps, you’ll save time and ensure that your content is well-structured and easy to follow.
So, let’s dive in and make crafting your next masterpiece as smooth as possible!
What is a Blog Post Outline?
A Blog Post Outline is a crucial tool for any content creator aiming to optimize their work for SEO. Think of it as a roadmap that guides you through the essential points you want to cover in your article.
It helps you organize your thoughts, ensuring that your content is coherent, logical, and engaging. A well-crafted outline can significantly speed up your writing procedure and improve the quality of your final piece.
Using a blog post outline template can be a game-changer, especially for those new to content creation. It provides a structured format you can follow, making it easier to include all the necessary elements like an introduction, main body, and conclusion.
This structure and blog post template help you write more efficiently and enhance readability, a crucial factor in SEO ranking.
Therefore, a blog post outline is an indispensable tool to help you write high-quality, SEO-friendly content. The blueprint streamlines the writing procedure, ensuring you get all vital information.
Why Should You Start Every Post With an Outline?
Creating the outline before you write your blog post is essential for several reasons. First, it provides a roadmap for your content, ensuring you stay on topic and maintain a logical flow. This makes the writing process faster and more efficient. Second, an outline can help you organize your thoughts, making it easier to present complex ideas understandably.
- Clarity: Outlines help you clarify your main points and supporting arguments, reducing the risk of going off-topic.
- Structure: It ensures that your post has a beginning, middle, and end, enhancing readability.
- Time-Saving: With a clear outline, you can write more quickly, saving valuable time.
Incorporating bullets in your outline can further break down complex ideas, making them easier to write about and for your audience to understand. So, take this crucial step: start every post with an outline.
What to Avoid While Creating an Outline
Creating the outline is crucial before you start writing your blog post. It serves as a roadmap, guiding you through the points you must cover. However, there are some pitfalls you should avoid to ensure your outline is effective and SEO-friendly.
Overcomplicating Things: Simplicity is key when creating the outline. Avoid adding too many sub-points or unnecessary details that can confuse your outline.
Ignoring SEO: While your primary focus is content, you must focus on search engine optimization. Make sure to include keywords and phrases that are relevant to your topic.
Lack of Structure: An outline should have a clear beginning, middle, and end. Skipping this can lead to a disorganized post that’s hard to follow.
Not Considering Your Audience: Always keep your target audience in mind. Avoid using jargon or complex language that your readers may not understand.
Skipping Research: An outline is not just about jotting down points you already know. Failing to conduct proper research can lead to a lack of valuable information in your post and your post could make less impact.
By avoiding these common mistakes, you’ll be well on your way to creating an effective outline to make the writing process smoother. Remember, a well-planned outline is the foundation of a successful blog post that ranks well in search engine results.
When Should You Write an Outline?
The question isn’t whether you should write an outline but when. The ideal time to craft an outline is right after you’ve done your preliminary research and you’re ready to write.
Here’s why:
- Clarity of Thought: Outlining helps you organize your thoughts, smoothing the writing procedure.
- Efficiency: You save time when you have a roadmap. You’re writing with a clear direction, which means your post isn’t going to meander aimlessly.
- Quality: A well-thought-out outline enhances the quality of your blog post, ensuring that you cover all the essential points.
So, before you dive into the deep end of content creation, take your time to outline your blog post. It’s a small investment of time that will pay off in a well-structured, coherent, and engaging article.
Key Elements of a Blog Post
Creating a compelling blog post involves several vital elements. It’s a good idea to start with an engaging introduction that hooks the reader. Learn how to write informative content that provides value, and remember to include a strong conclusion and call to action. SEO-friendly headings and keywords are also essential.
Before the outlining process starts, you must know the key elements of a blog post.
A Captivating Headline
The first thing that grabs a reader’s attention is the headline. A captivating headline is essential for drawing in your audience. It’s the first impression you make, and it needs to be a good one. Use free keyword research tools to find terms that resonate with your target audience and incorporate them into your headline for SEO benefits.
A Strong Lead/Introduction
The lead, or the introduction, sets the tone for the entire blog post. A strong lead should be engaging, informative, and give the reader a reason to continue. This is where you can brainstorm ideas to hook your audience with a question, statistic, or bold statement.
A Well-Optimized Post Structure
The structure is the backbone of your blog post. A well-optimized post structure includes a clear introduction, body, and conclusion. Each section should flow logically into the next, making it easier for readers and search engines to understand the content. This is your perfect blog post format.
An Easy-to-Read Word Count
While there’s no one-size-fits-all word count, your post should be long enough to provide valuable information but short enough to keep the reader’s attention. Aim for a word count that allows you to cover the topic comprehensively but is also easy to read.
Skimmable Content
In today’s fast-paced world, only some have the time to read every word. Make your content skimmable with bullet points, subheadings, and short paragraphs. This allows readers to find the information they’re looking for quickly.
Compelling Visuals
Visuals are more than just decoration; they enhance your blog post by breaking up text and illustrating points. Use high-quality images, infographics, or videos to complement your content and make it more engaging.
By focusing on these key elements, you’ll be well on your way to crafting a blog post that not only resonates with your audience but is also SEO-friendly.
How to Write a Blog Post Outline in 8 Easy Steps
Creating the outline for blogs can be a little time-consuming. Follow this step-by-step guide to go to write the post outline in just 8 easy steps. You’ll save time and effort with a well-structured outline of an article. You can also use the free template to streamline the process even further.
Creating a blog’ outline is an essential step in content creation. It serves as a roadmap, guiding you from the introduction to the conclusion of your article. An engaging blog post outline can help you write better, streamline your thoughts, and simplify the writing process. Here’s how to outline your next post in just 8 simple steps.
Step 1: Identify the Core Concept
The first step in creating an appealing blog post outline is to identify the core concept of your article. What is the main idea you want to convey to your readers? This will be the foundation upon which the entire article is built. You can use a Google doc to jot down your thoughts and refine your core concept.
Step 2: Clarify the Desired Outcome
What do you want your readers to gain from your blog post? Whether learning a new skill, understanding a concept, or taking a specific action, having a clear desired outcome will help you focus your content. This is also the time to consider the best blog title that aligns with your desired outcome.
Step 3: List Down The Important Points
List the key points or subtopics you want to cover in your blog post. These points should support your core concept and help you achieve the desired outcome. This is a crucial section of your blog post outline, so take your time to think it through.
Step 4: Find Knowledge Gaps
Before you start writing, it’s essential to identify any knowledge gaps you may have about the topic. What do you need to research further to provide value to your readers? Make a list and spend some time filling in these gaps.
Step 5: Examine Existing Knowledge
Take stock of what you already know about the topic. This will help write an article that is both informative and engaging. Your existing knowledge can be a foundation, making building a comprehensive and effective blog post easier.
Step 6: Group Related Topics
Look at the key points you’ve listed and group related topics together. This will help you create a logical flow for your blog content. Each group can become a separate section or even a subsection, depending on the depth of information you want to provide.
Step 7: Formulate Summary Titles
For each group or section, formulate summary titles that encapsulate the main idea of that part. These titles will serve as subheadings in your blog post, making it easier for readers to navigate through your content.
Step 8: Use a Template
Consider using a blog post outline example or template to make the process even more streamlined. This can serve as a guide, helping you structure your outline first before diving into the writing phase.
Don't Forget to Outline Introduction and Conclusion
Remember to outline the introduction and conclusion of your blog post. The introduction should hook the reader and introduce the core concept, while the conclusion should summarize the key points and reiterate the desired outcome.
By following these 8 easy steps, you’ll be well on your way to creating a top-quality, SEO-friendly blog post outline. This will make the writing process more manageable and help you produce a more organized and compelling blog post in line with Google’s algorithms.
So, the next time you write an article, remember these steps and start with an outline. It’s a simple yet powerful way to improve the quality and effectiveness of your blog posts.
Why Should You Use This Approach To Write Your Next Blog Post Outline
Creating a blog post’s outline is a crucial step every article writer should take before diving into the writing process. But why should you use this approach?
Here’s why.
Time-Efficiency
The most obvious benefit is the ability to write fast. This approach allows you to create a good outline in just 8 minutes, saving you valuable time that can be better spent on crafting the final post.
Structured Content
Having an outline like this ensures that your content is well-organized from the get-go. It is a blog outline template you can follow, making it easier to begin writing without feeling overwhelmed.
Enhanced Quality
When you have a well-structured outline, the quality of your writing content is significantly improved. It helps you focus on each section individually, ensuring that you write coherent and engaging
content.
The approach to drafting an outline is a game-changer for anyone looking to write high-quality blog posts efficiently. It offers a quick and effective way to create an outline, setting the stage for a compelling final post.
Write Your Next Blog Outline With CopyScribe AI in 2023
In the digital age, blogging can be both an art and a science. If you want to write faster and more efficiently, CopyScribe AI is the tool you’ve been waiting for. This AI article writer is designed to streamline your writing process, helps in brainstorming ideas and making your writing quicker, more structured, and impactful
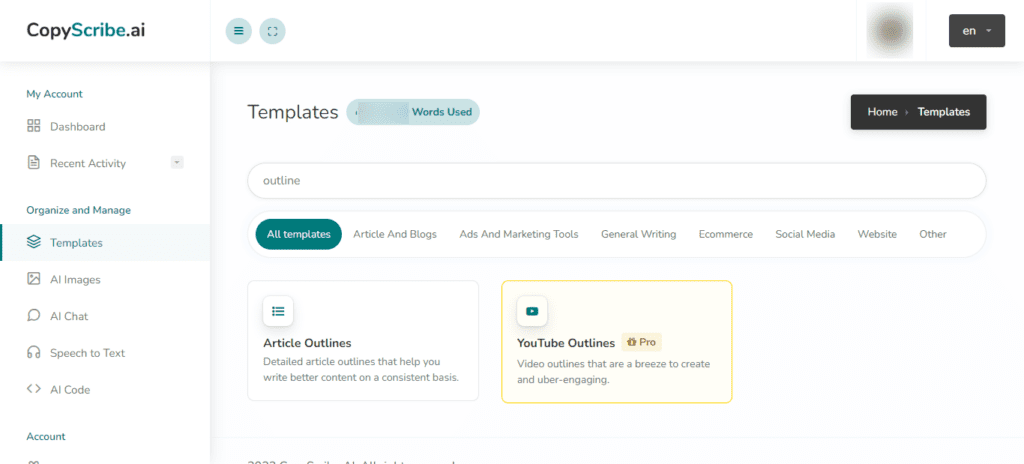
Step 1: Open the Article Outlines Template
Navigate to the article Outlines section on CopyScribe AI. Here, you’ll find a variety of templates, including a how-to guide, basic blog formats, and more. Feel free to adapt these templates to suit your specific needs.
Step 2: Choose Your Topic and Keywords
Before you write your entire blog post, you must decide on a topic and the keywords you want to focus on. CopyScribe AI offers a keyword analysis tool to help you identify your post’s most relevant terms.
Step 3: Choose Your Blog Topic
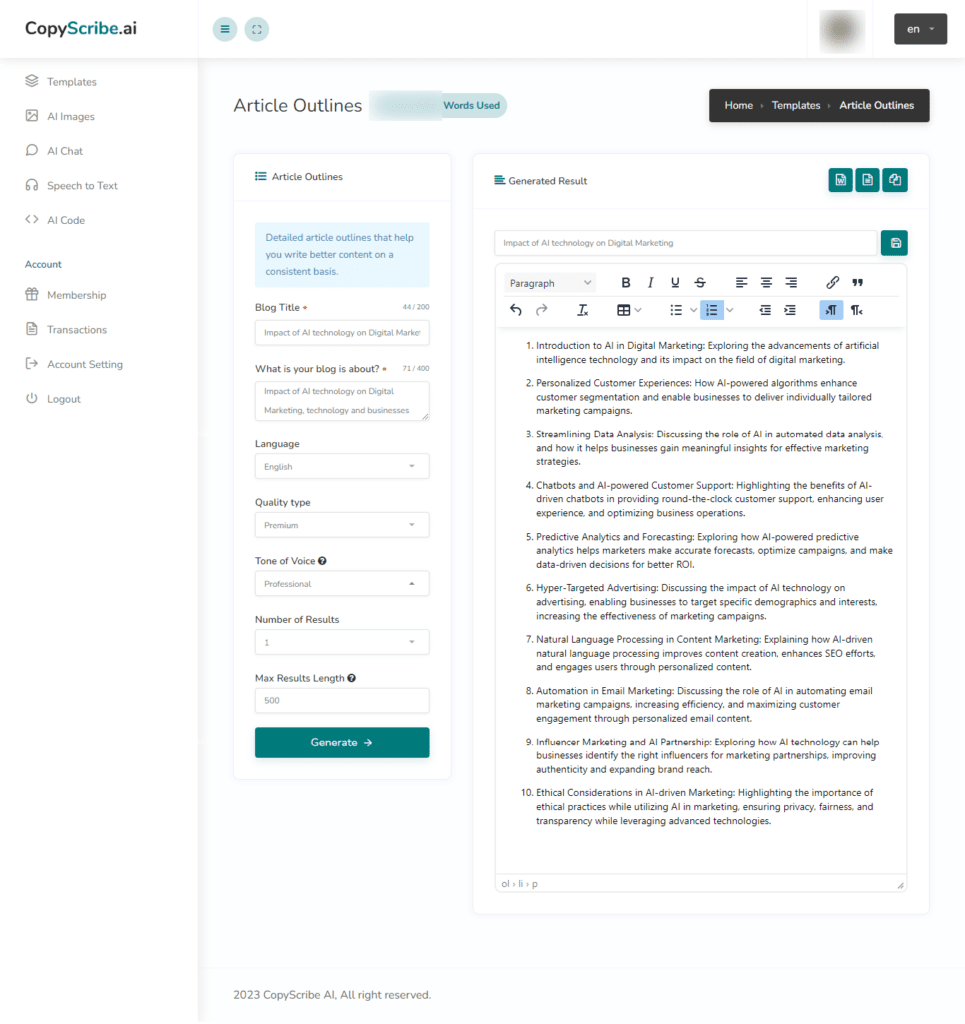
With CopyScribe AI, you can outline the main sections of your blog post in just a few minutes. The software’s intuitive interface makes arranging your thoughts and structuring your content accessible. You’ll be excited to write your post once you see how effortlessly your ideas come together.
Step 4: Select Language and Quality Type
Choose the language type and content quality you aim to create. To write something longer and more comprehensive, you can easily add subsections and bullet points within the main sections of your outline. This will help you organize your post around specific themes or ideas.
Step 5: Choose Number of Results
When it comes to writing the article, CopyScribe AI’s advanced AI writing features can generate content suggestions based on your outline. This can be particularly useful for those tricky sections in your blog post you need help with.
Step 6: Learn How to Create Engaging Titles
Your blog post title is the first thing your readers will see, and CopyScribe AI can help you craft a title that grabs attention. The platform offers title-generation features that use AI algorithms to create compelling headlines.
Step 7: Review and Revise
Outlines are also an excellent tool for the revision process. Once you’ve written your draft, you can go back to your outline to ensure that you’ve covered all your main points and that the flow of the post is logical and engaging.
Step 8: Finalize
The last step is to finalize your draft and get ready to publish. CopyScribe AI offers a range of editing tools to help you polish your post, ensuring it’s of the highest quality before it goes live.
Conclusion: The Future of Blogging is Here
CopyScribe AI is revolutionizing the way we approach blogging. This tool offers a comprehensive solution for all your blogging needs, from writing a post outline to creating one blog post and crafting the final draft.
So why wait? Start making your writing life easier with CopyScribe AI today. Use this magical and budget-friendly tool to write your outline and structured blog.